 LEDsplay
Free
$0forever
Everything you need to see your playing light up.
- Key lighting as you play
- All 17 LED animations
- 11 songs to learn, with sheet music and falling notes
No card, no account.
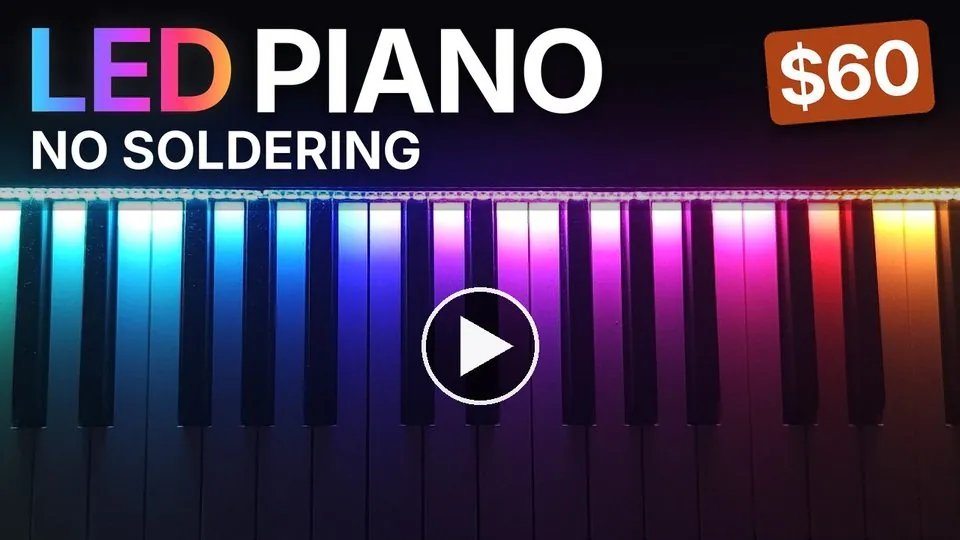
LEDsplay is Raspberry Pi software for an LED strip you build yourself: about $60 in parts, no soldering. Every key you play lights up, and in learning modes the next one waits for you.
Everything is in the browser app. Tap a mode to see the real screen. Free modes stay free forever; Pro modes are free to try for 14 days.
The next keys light up, and the app waits until you play them. Follow real sheet music or falling notes. Practise one hand while the app plays the other, slow the tempo down, loop the bars that trip you up. 11 classics are free, from Für Elise to Clair de Lune.
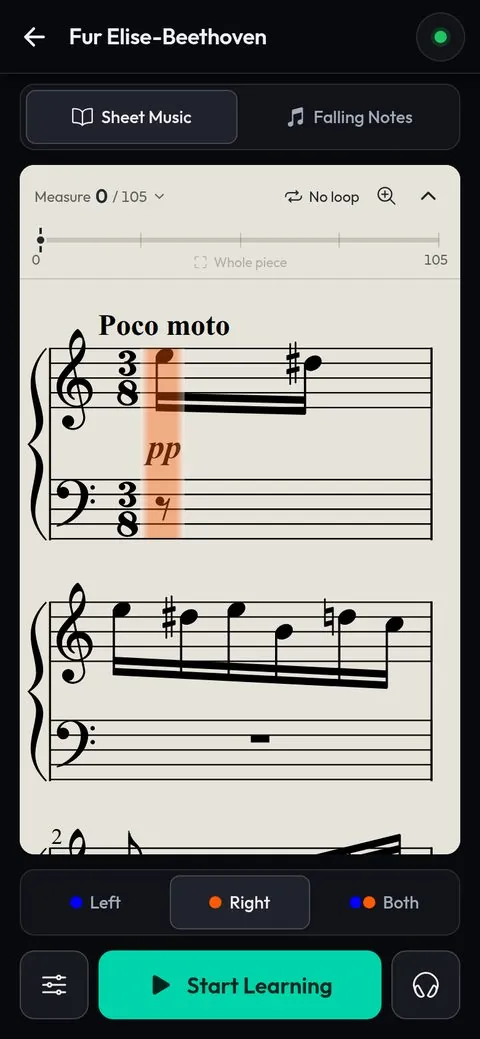
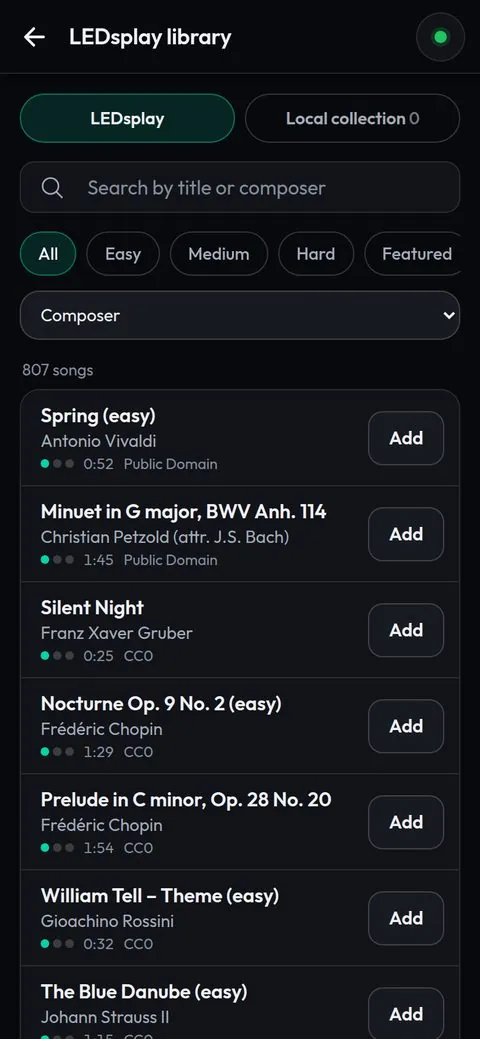
Upload your own MIDI or MusicXML files, and the lights teach them to you. Or pick from about 800 public-domain songs, sorted by composer and difficulty.
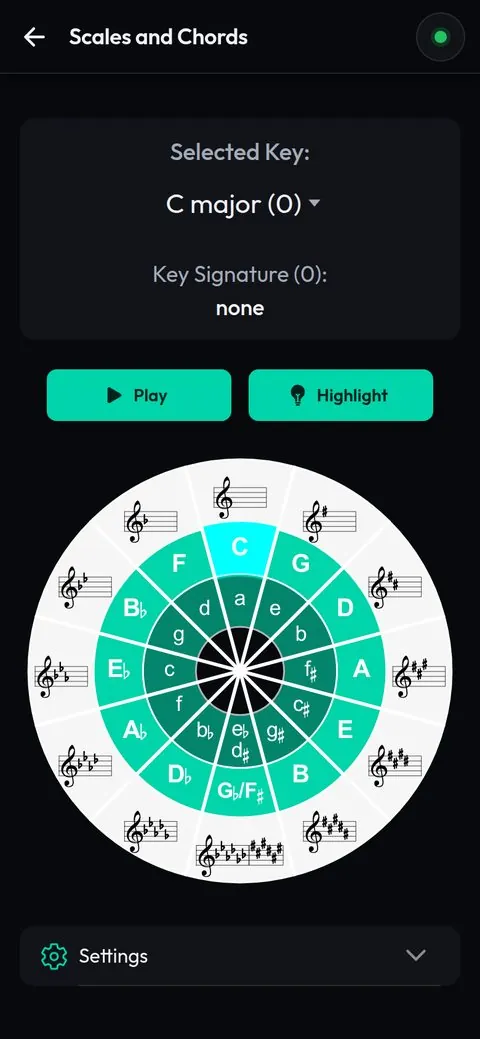
Note training has 6 modes: note names, reading from the staff, ear training, chords, intervals and sequences, each with levels and stats. For scales, pick any major or minor key on the circle of fifths, and the strip lights up its scale.
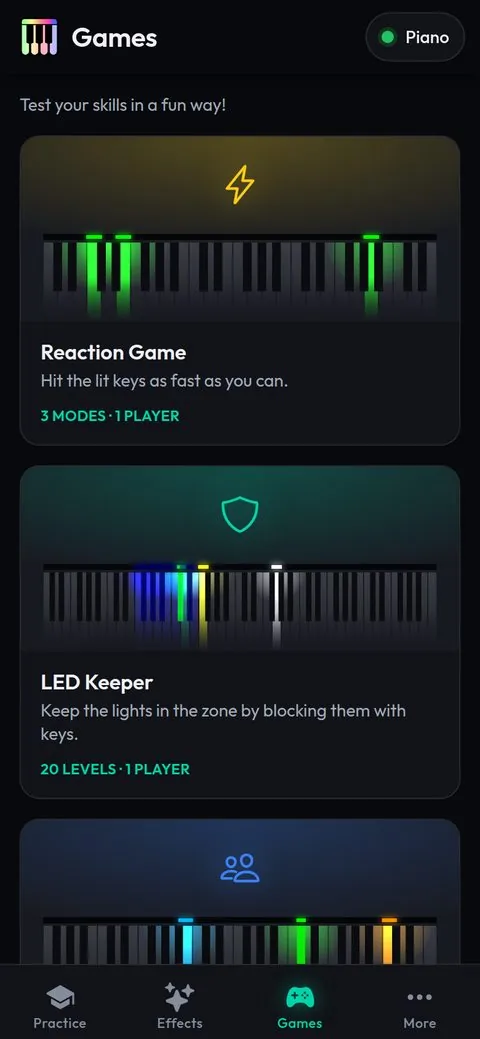
Reaction Game: hit the lit keys as fast as you can, in 3 modes. LED Keeper: keep the moving lights in the zone, over 20 levels. Piano Battle: two players on one split keyboard.
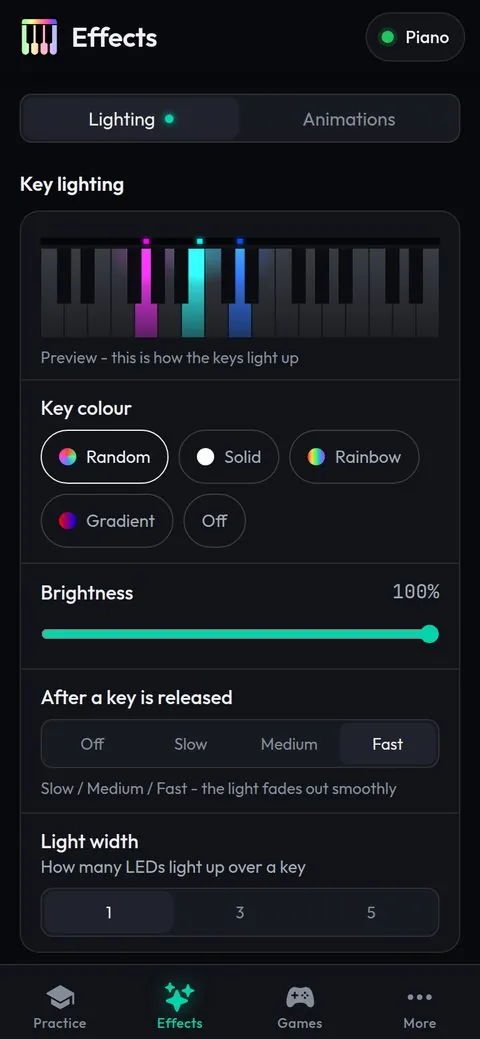
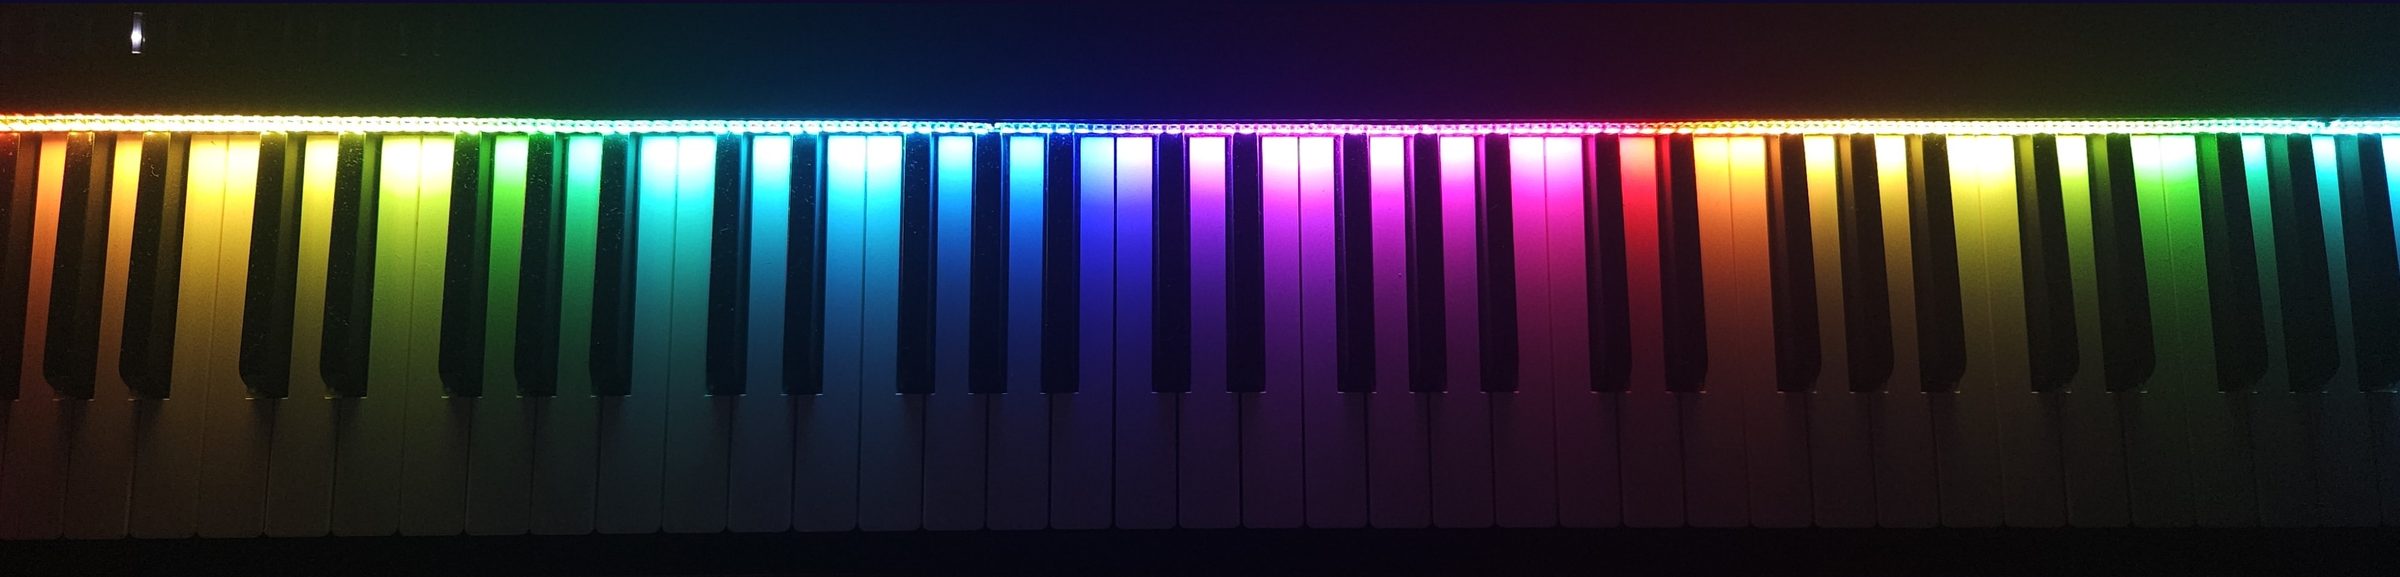
No setup per song, no menus. Sit down, play, and watch the strip follow your hands. Pick the colour (solid, rainbow, gradient or random), the brightness and how slowly each light fades.
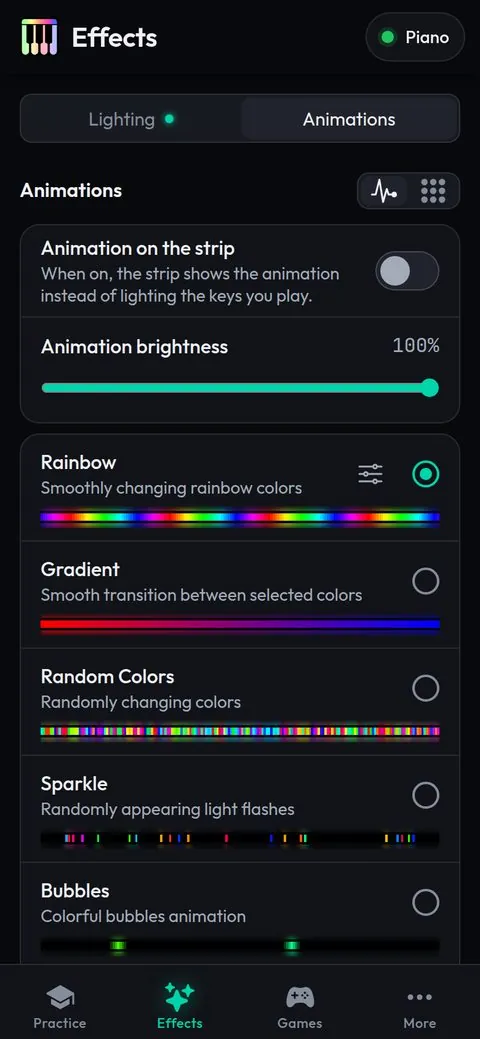
17 animations, from Rainbow and Tetris to Aurora Borealis and Fireplace. Start one from your phone, or let one come on by itself when nobody is playing.
No cloud, no account. Your piano, a small computer and a strip of lights talk to each other in your room.
It sends every note over a USB cable (that's MIDI) to the Raspberry Pi.
A Raspberry Pi running LEDsplay hears each note in real time and decides what to light.
An LED strip along the keyboard glows above the key you pressed, or the next key in a song.
Open ledsplay.local in any browser to pick songs, modes and colours.

LEDsplay is the software. You bring a digital piano and put together the hardware yourself. We don't sell hardware.
| Raspberry Pi | Zero 2 WH (pins already soldered), 3B, 3B+ or 4B. Not Pi 5. | $18–22 |
|---|---|---|
| microSD card | 8 GB or larger, Class 10 / A1 | ~$5 |
| LED strip | WS2812B, 5 V, 144 LEDs per metre. Buy 2 m in one piece. | $15–20 |
| Power supply | 5 V 3 A (4 A for a 3B, 3B+ or 4B). One supply for the Pi and the strip. | $5–15 |
| Cables & wires | USB cable to the piano, a few wires | $6–13 |
| Digital piano | Any with USB MIDI output | yours |
| All parts | All the parts with a Pi Zero 2 WH, without the piano. | about $60 |
Not a fit if you want a ready-made device, your piano is acoustic or has no USB MIDI port, or you only have a Raspberry Pi 5 (not supported).


No subscription, no account. Software only: you build the hardware. Full refund within 14 days if it's not for you.
Try Pro free for 14 days. The trial starts by itself the first time LEDsplay runs. No card, no account, nothing to cancel. When it ends, the free version keeps working. Tip: use the trial to learn a song you love. Pick one from the library or upload your own.
Everything you need to see your playing light up.
No card, no account.
Everything in Free, plus your own songs and all the learning tools.
Secure checkout by Lemon Squeezy. Full refund within 14 days, for any reason.
“Version 1.0.16 is FIRE! Works very great! Mid file have now Partition [sheet music]! It Rocks!”
Any digital piano with a USB port for MIDI. Look on the back for a port labelled “USB TO HOST” or “USB COMPUTER”; it's usually the square kind (USB-B). A port for USB sticks won't work. LEDsplay is tested on a Roland FP-30.
About $60 for all the parts with a Raspberry Pi Zero 2 WH. The software is free to start; Pro is $9 once, if you want it.
A Raspberry Pi Zero 2 W, 3B, 3B+ or 4B. Get the Zero 2 WH: its pins come already soldered, while the plain Zero 2 W needs them soldered on. The Zero also fits the optional PCB and case. A Pi 5 isn't supported.
No, it's optional. Buy an LED strip sold as 2 m in a single piece and plug the signal wires onto the Pi's pins. The strip's two power wires can be twisted onto the supply cable and covered with heat-shrink, or soldered if you prefer. The hardware list covers the details.
177 LEDs, which is about 1.23 m of a WS2812B strip with 144 LEDs per metre. Buy it as one 2 m piece and cut it to length. The hardware list has the details.
You don't need a terminal. Write the LEDsplay image to a microSD card with Raspberry Pi Imager and start the Pi. On your phone, join the LEDSplay-Setup Wi‑Fi and pick your home network, then open ledsplay.local in your browser. Prefer the command line? A one-line install script takes about 5 minutes. Step by step: the install guide, or the install part of the build video.
Every Pro feature is free for 14 days. The trial starts by itself the first time LEDsplay runs: no card, no account, nothing to cancel. When it ends, the Pro features lock and the free version keeps working forever.
Try the free version and the Pro trial first, so you know it works with your piano before you pay. If you buy Pro and change your mind, you get a full refund within 14 days, for any reason: just reply to your Lemon Squeezy receipt. Details are in the refund policy.
Your license key arrives by email after you pay. In the app, open More → License, paste the key and tap Activate. Pro works right away, with no restart. One key works on up to 3 devices.
No. Pro is $9, paid once, for up to 3 devices, and it includes all future features. LEDsplay runs on your Raspberry Pi, with no cloud and no account.
Email ledsplay@pawel.build and describe what you see: your Raspberry Pi model, your piano and the step where it stopped. A photo of the wiring helps a lot. Bug reports are also welcome on GitHub Issues (opens in a new tab).
Start with the free version. Try Pro free for 14 days, then pay $9 once if you want to keep it.